Tuesday, March 25, 2014

WOYWW-March 26-Spring?

The soft focus is intentional, as it's another week when I can't really show you anything in detail.
And the reality that it is snowing outside my window has me in a bit of a tizzy!
The envelopes are full of new stamps going out to the Quietfire Design Team. 
The ATC has a sneak peak of the Illuminated Letters stamps that I promise you will love!
(forgiveness Suzanne!)
The potted sentiment on the left sprang(ouch) from a grab bag of Winter CHA swag.
You can read about that on Thursday at Quietfire Creations.
Thanks for visiting, such as it is, and I look forward to my snoop around your place!
Comment and Questions always welcomed!

Monday, March 24, 2014

Music and Friends a 15 Minute Wonder Card

This card goes out to a dear friend,mentor, musician and poet, Linda who brings beautiful music onto the world and nurtures music in others.

Happy Birthday Linda! You can find out more about her art here.

Set your timers!


Products:

Instructions;
  1. Cut  and score green card stock to A2 size. Distress the edges and color with gold ink.
  2. Cut patterned paper to desired size leaving a small border.
  3. Stamp sentiment in Onyx ink and thermal emboss clear.
  4. Adhere patterned paper to card front with E-Z Dots
  5. Cut the prongs off of the brads. Adhere with tiny piece of 3D Dot.
  6. Admire!
Comments and Questions Welcomed!

Thursday, March 20, 2014

Byhand Artist's "in the bleak midwinter" Rolodex Mingle

As the mood strikes us, we have a Rolodex Mingle in the Byhand Artist Group, shepherded by Suzanne Cannon of Quietfire Design.

Begin with a theme and a call to entry and your mailbox gets happy!
"...In the bleak midwinter..."
Amazing works of he(art) byhand by all!

 This is mine.


Products:

Directions
  • Cut one  plain card from the solar white and one patterned paper with the snowflake.
  • Stamp the sentiment with VersaMark ink and thermal emboss white.
  • Randomly emboss your card using a mallet or your die cut/embossing machine
  • Color the card with the stormy sky ink,avoiding the raised areas, dry well.
  • Highlight the raised areas with the white chalk ink.
  • Apply sticky embossing powder, and with the glitter close at hand, heat the powder till it melts and quickly apply the glitter and  press it in with your fingers, or a pressing paper.
  • Glue the patterned paper to the back of the card and apply glitter to the snowflake.

Once all the cards arrive I swap them out and send them out and wait for the joyful 
"they're here!" emails to arrive!
Anne
 Beth 
Beth made one for a friend who lost her husband. We do that here. Join us and sign up for our RAK list.

 Charmaine
 Joanne
 Suzanne

I've just put them in the mail and am already planning the next mingle.
Sometimes it hard to send your cards out into the world!

Comments and questions always welcomed.


Wednesday, March 19, 2014

Flourish and Grow and ATC Giveaway!


The best way to come out of a creative doldrums is to have Quietfire Design and Scrapbook Adhesives send you packages of great stuff!
Please hop over to the Quietfire Creations to see my project today on the Blog Hop and here is another project and and ATC Giveaway.

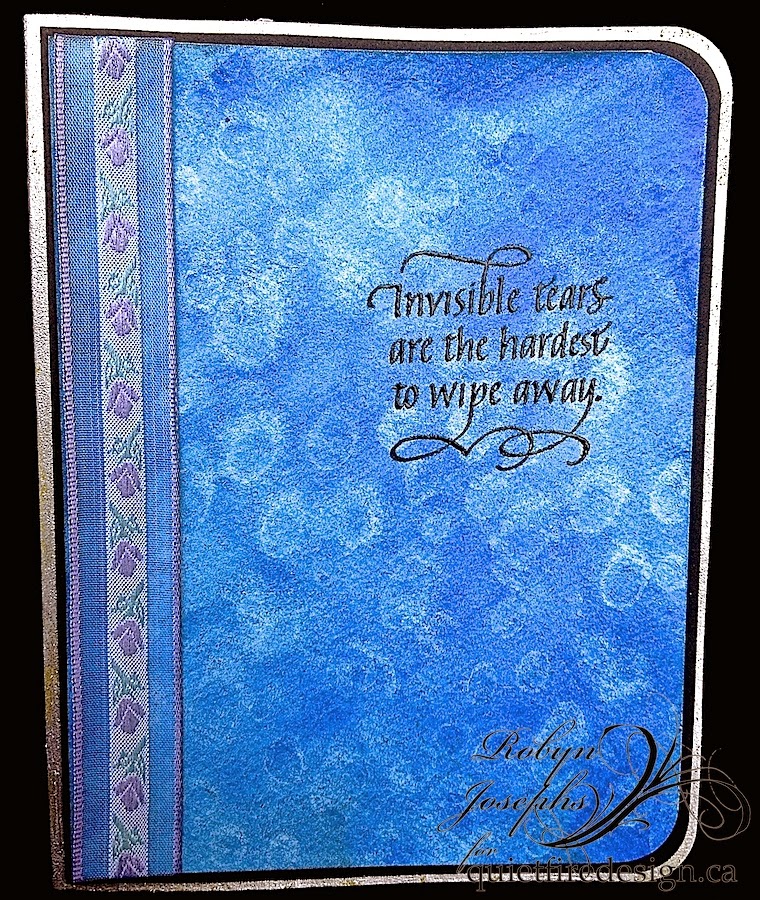
This card has a bit of everything, I love the dimension and it folds flat for mailing!

Their may be ice outside my window, and these bunnies are happy as , well as bunnies, frolicking in the green leaves!

Scroll down for the ATC Giveaway and be sure to fill out Rafflecopter and leave a comment for a chance to win!


Products:

  • Quietfire Design Digital file- Bunny Pop-up in Heart Shape
  • Quietfire Design Rubber Stamp-Flourish and Grow
  • Scrapbook Adhesives-3D Foam Shapes Hearts
  • Scrapbook Adhesives-E-Z Dots Mini
  • Scrapbook Adhesives-3D Dotz
  • Heart box digital file
  • K & Company Designer paper
  • Neenah Classic Crest Desert Sand 80lb card stock
  • Ranger Distress Ink-Mowed Lawn, Vintage Photo, Tea Die
  • Ranger Embossing Powder-Detail Clear, Silver, Eggplant
  • Ranger Distress Markers- Spun Sugar, Dried Marigold, Shaded Lilac, Squeezed Lemonade, Tumbled Glass
  • VersaFine Pigment Ink-Imperial Purple
  • Tracing paper
  • Embroidered ribbon
  • Leaf stamp

Here are my files on the Cameo mat. 
The pop-up bunnies are from the Quietfire file and I created the card around them.
Leave a comment if you would like to see a tutorial. It's easier than you think. Really!

Here is the card cut and scored. I do my scores by hand.

The bunnies progression

Right off the mat.


Popped up.


Colored!


Instructions:

  • Cut your paper pieces.
  • Score the card and color as desired with Distress Inks.
  • Stamp and color the bunny heart-Push the bunnies to the back to stamp a background design.
  • Adhere ribbon to the top and bottom of edge of the card with Mini Dots.
  • Fold the card and run the Mini dots on the inside of the small flap to assemble .
  • Place 3D Dotz on the back of the bunny heart and place inside the card.
  • Remove the over paper of 3, 3D Foam Hearts and thermal emboss with a mix of eggplant and  silver embossing powder. ( see the tip below with the ATC's). Place on the card front.
  • Admire!

These ATC's are from my "Off the Desk" Series.
At the end of the day I use only what is on my desk to create one or more ATCs.
Suzanne just sent me the Flourish and Grow stamp and  I'm stamping this sentiment on anything that doesn't move!
I've enjoyed  the 3D Foam Shapes more than I thought I would.
The trick to using the small bits it leaving them in the foam backing and just removing the cover paper of the shape while applying your embellishment.
Above I'm using some thin foil guilding, and the same process was used with the embossing powder.
Next you can push your shape up from the backing paper and put it in place on your project.

The Give Away
 Leave a comment and Follow my blog by email, and you may be randomly picked to receive one of the ATC's.
I will contact you by email and you will have 24 hours to get back to me with your mailing info.


These will get bigger if you click on them!


Comments and Questions Always Welcomed!


Tuesday, March 18, 2014

WOYWW March 19, Blog Hop! and ATC Giveaway!


Above you see the detritus and backstory of a blog hop. Those projects don't just spring fully formed from my head a la Athena! 
Soon as i click this photo I am doing a massage cleanup!
You can hop over right now to see the fruits of this labors  playtime at Quietfire Creations. There are 5 days of inspiration, so be sure to scroll around and fill out the rafflecopter for a chance to win fab prizes.
{NOTE- UK followers  -I got an email from Oyster Paper Crafts that she just got in a huge Quietfire order.}


Below is more of the present and the future!
The star card went off to my DF Sissy for her birthday.
I love ATC's. the three behind and the box card to the left are revealed in my ATC giveaway post, which you may need to come back for, to enter to win one of the ATC's.
Subscribe by email and you won't mis a thing!
The grid like mess back right is the beginnings of my WOYWW Anni ATC, let me know if you want to swap. I just read that Julia's WOYWW crop is the week before and we can send ATC's to her if you will be there- so, we'd have to think ahead! If you want to swap and will be there- don't delay in letting me know-comment below!
The new cut files front and center.
I was told not to use them till they are posted in the Silhouette store, and how can I keep them from you dear Deskers! They are on my desk!

Scroll around for the Giveaway-fill out my new best-y Rafflecopter and thanks ever so much for visiting and leaving your comments and questions.

The Challenge!

 Every Tuesday CardMaker Magazine posts a FB challenge.

This weeks is "rain splashed".

Using watercolors I created heavy washes on watercolor paper, and then flicked, sprayed and splattered water on them to get the splashed effect.

On this one I sprayed a water droplet stamp by Ryn, and stamped it into the wet paint to pull away the color.

The perfect sentiment stamped in VersaFine Onyx and thermal embossed clear.

These splashes were made by dropping water into the wash with a pipette. The sentiment is stamped in VersaMark and thermal embossed with white powder.

I could have make dozens of these.

I think of them as sympathy cards, and  trust I won't need dozens in the near future!


Be sure to visit Quietfire Creations tomorrow for the Quietfire & Scrapbook Adhesive Blog Hop and stop by here for some backstory and ATC giveaway!

Comments and Questions always welcomed.

Sunday, March 16, 2014

Quietfire Design & Scrapbook Adhesives Blog Hop Sneak Peak

A sneaky peak into what's in store for you this week at Quietfire Creations and Scrapbook Adhesives.
Be sure to stop by each day, leave a comment and fill out Rafflecopter to be entered to win a $60 prize!
Comments and Questions Welcomed.


Tuesday, March 11, 2014

WOYWW-Blush!

Follow this link and you will see me digitally blushing and tossing gratitude glitter around for the kind words of Julia bestowed to Quietfire Design.
Again, my humble thanks.
To get as happy and as inspired as Julia, please join us next week on our Blog Hop with Scrapbook Adhesives.
I'd love to send a prize off to a desker friend of mine, and the inspiration is priceless!

To prove that I can in fact follow the rules, above is a totally unstaged photo of my desk, complete with projects that must be finished yesterday, paperwork that needed to be dealt with yesterday, poetry journals waiting to be filled, and my distraction of the day, a kumihimo set I got at the thrift shop for $4 with tons! of craft thread in gorg colors and 8 cardboard color coded disks to to the braiding.
And I'm keeping it short.
Oh- great excitement about the upcoming Anni and ATC swap.
I'll be making one for my neighbor, one for Julia, and one for anyone else you leaves a comment sand says "I'd love to swap"
Comment and Questions always welcomed.